Basic Horse Safety
Approaching
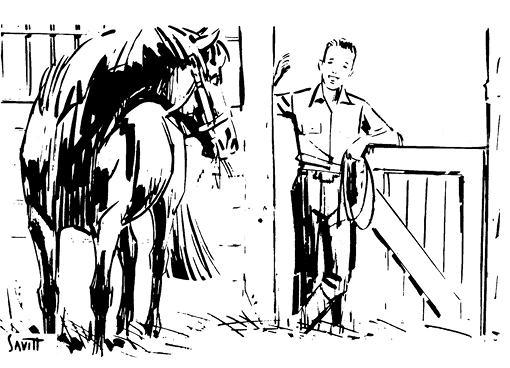
Always speak to your horse before approaching or touching it. Some horses are likely to jump and may kick when startled.
Always approach your horse from the front. If the horse is turned away from you, call to it or entice it with a treat to get it to come to you. Never approach your horse directly from the rear. Even in a tie stall, it is possible to approach from an angle at the rear.
Pet a horse by first placing a hand on its shoulder or neck. The touch should be a rubbing action. Don’t “dab” at the end of a horse’s nose.
If the horse is tied, get it to look at you. Always notice a horse’s expression before advancing.
Handling
When working around your horse, wear boots or hard-toed shoes to protect your feet. Never wear tennis shoes, moccasins, or no shoes.
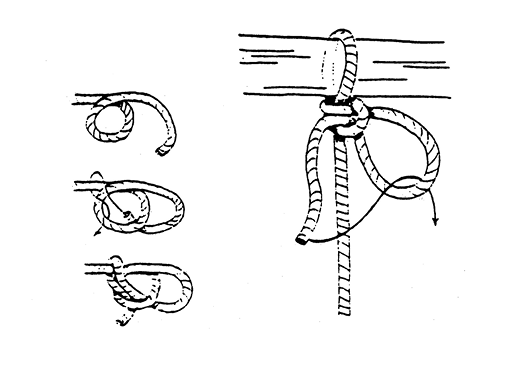
When working around your horse, tie it securely with a quick-release knot, or have someone hold it with a lead rope. Use cross-ties when possible, but be sure they have panic snaps or are secured with a breakable tie, such as baling twine.
Always work close to your horse. If you are near its shoulder, you won’t be struck with the full force of a kick when you work on the haunches. Work on a horse from a position as near the shoulder as possible.
Never stand directly behind a horse or directly in front of it. To work with its tail, stand off to the side, near the point of the buttock, facing to the rear. Grasp the tail and draw it around to you. Stay close to your horse when you pass behind it.
Know your horse, its temperament, and its reactions. Control your temper at all times but be firm.
Always let a horse know what you intend to do. For example, when picking up its feet, do not grab the foot quickly. This will startle the horse and may cause it to kick. When lifting the foot, touch the shoulder or hindquarter. Then, run your hand down the leg. When you get to the fetlock, say “up” and squeeze the joint. The horse should pick up its foot for you.
Be calm, confident, and collected around horses. A nervous handler can make a nervous horse.
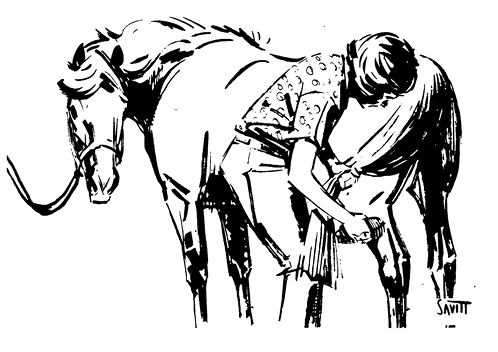
Do not drop grooming tools underfoot while grooming. Place them where you will not trip on them and the horse will not step on them.
Don’t tease your horse. Teasing may cause it to develop dangerous habits for the rest of its life. Avoid feeding the horse treats from your hand frequently.
Punish a horse the instant it disobeys. If you wait—even for a minute—it will not understand why it is being punished. Punish without anger or your punishment could be too severe. Never strike a horse on its head.
Be sure your turnout area has been checked for old machinery, broken boards and nails, poisonous plants, and wild cherry, red maple, or black walnut trees. Fences should be checked frequently for loose nails, broken sections, and loose wire.
If it is necessary to leave a halter on a loose horse, the halter must be a break-away halter. You can make a break-away halter by using a piece of baling twine or by replacing the crown piece with a section of an OLD, lightweight, leather belt.
If the halter is too loose, the horse may catch a foot in the halter, especially if it is trying to scratch its head with a hind foot. A loose halter may catch on fence posts or other pasture objects. Some halter materials will shrink if they get wet, so be sure to check the fit.
Leading
When leading your horse, walk beside it—not ahead or behind. A position even with the horse’s head or halfway between the horse’s head and its shoulder is considered safest.
Always turn the horse away from you and walk around it.
Use a long lead shank and both hands when leading. If the horse rears up, release the hand nearest to the halter so you can stay on the ground.
It is customary to lead from the left (near side), using the right hand to hold the lead, near the halter. The excess portion of the lead should be folded, figure-eight style. When leading, extend your right elbow slightly toward the horse. If the horse makes contact with you, its shoulder will hit your elbow first and move you away from it.
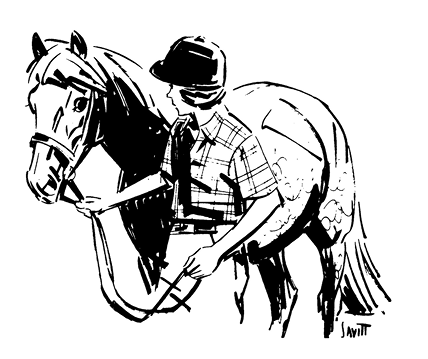
Your elbow can also be used in the horse’s neck to keep the head and neck straight, as well as to prevent the horse from crowding you. A horse should be workable from both sides, even for mounting and dismounting.
The horse is stronger than you, so don’t try to out-pull it.
Never wrap the lead shank or reins around your hand, wrist, or body. A knot at the end of the lead shank aids in maintaining a secure grip when needed for control. Never drape the lead shank or reins across your shoulders or neck.
Don’t wear jewelry around horses. Rings can cut deeply into fingers, and bracelets can get caught in reins or lead lines. Dangling earrings are particularly dangerous.
Be extremely cautious when leading a horse through narrow openings such as doors. Be certain you have firm control and step through first. Step through quickly and get to one side to avoid being crowded.
At any time you are dismounted or leading the horse, the stirrup irons on an English saddle should be run up or dressed. Be cautious of the stirrups of a Western saddle catching on objects.
Avoid using excessively long lead ropes to keep from getting tangled in them. Watch the coils when using lariats or lunge lines.
Use judgement when turning a horse loose. Lead completely through the gate or door and turn the horse around, facing the direction from which you just entered. Then, release the lead shank or remove the halter or bridle. Avoid letting a horse bolt away from you when released. Good habits prevent accidents.
Tying
Know and use the proper knots for tying a horse. Two basic knots every horse rider should know are:
- Quick-release knot. This knot should be used whenever you tie a horse with the halter rope. This knot allows you to release the horse quickly in the event the horse gets into trouble.
- Bowline knot. This knot is used when tying a rope around the horse’s neck. The loop will not tighten up, and the knot will not slip.
Tie your horse far enough away from strange horses so they cannot fight. Tie a safe distance from tree limbs or brush where the horse may become entangled. Tie your horse with a rope long enough to allow comfortable movement but short enough to avoid becoming tangled or getting a foot over the rope.
Never tie your horse by the reins because it may pull back and break the reins or injure its mouth. Always use a halter.
Be sure to tie the rope to an object that is strong and secure to avoid the danger of breaking or coming loose if the horse pulls back. Never tie below the level of the horse’s withers. Tie to a post set in the ground, not to a rail on a fence. Once a horse has broken loose once, it is more likely to pull back again.
Saddling
Western
Carefully check the horse and tack before saddling. Make sure all stitching is secure and the blanket is clean. Be sure the horse’s back and girth area are clean.
Place the off-side cinches and the right stirrup over the seat. Stand with your feet well back in the clear and reach forward when saddling. Swing the Western saddle into position easily—not suddenly. If you drop the saddle down too quickly or hard, it may scare the horse. Go to the off side of the horse and gently let the stirrup and cinches down. Don’t let them hit the horse on the belly or the leg.
When using a Western doublerigged saddle, remember to fasten the front cinch first. Unfasten the rear cinch first when unsaddling. Pull the cinch up slowly when tightening. Don’t cinch too tightly at first. Tighten just before mounting. Then, walk and turn the horse before mounting.
Fasten accessory straps (tie-downs, breast collars, martingales, etc.) after the saddle is cinched. Unfasten them when unsaddling.
The back cinch should not be so loose that your horse can get a hind leg caught between the cinch and its belly, or so tight that it irritates the horse.
Check the cinch three times:
- After saddling
- Just before mounting
- After riding a short distance
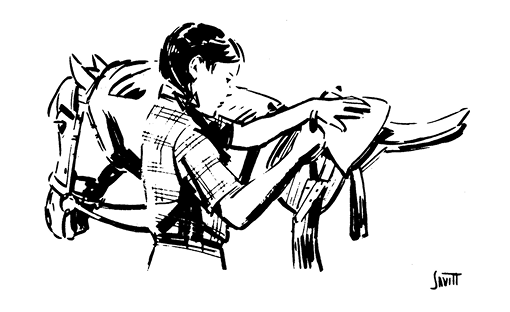
English
Carefully check the horse and tack before saddling. Make sure all stitching on the stirrup leather, billet straps, and girth buckles is secure.
Check the pad to be sure that it is clean.
The stirrup safety bar should be down. The stirrups should be run up before placing the saddle on the horse’s back. The girth should be across the seat.
Stand with your feet well back from the horse and reach forward when saddling. Place the pad high on the withers, then slide it backward onto the back. This smooths the horse’s hair.
Check the girth three times:
- After saddling
- Just before mounting
- After riding a short distance
Bridling
Always untie your horse before removing the halter. Stand in close, just behind and to one side (preferably on the left side) of the horse’s head. Handle the horse’s ears carefully.
Keep control of the horse when bridling by refastening the halter around the neck.
Be careful not to bang the horse’s teeth when bridling or unbridling. Ask your horse to open its mouth by putting one or two fingers in the corner of its mouth.
Be sure the bridle is properly adjusted to fit the horse before you ride:
- Check the bit—there should be one or two wrinkles at the corners of the mouth.
- The throat latch should be adjusted so that you can insert three fingers between the throat latch and the horse’s jaw.
- The cavesson (if used) should be relatively tight. You should only be able to insert one finger between the cavesson and the nose.
- The curb chain (if used) should be flat and not twisted. You should be able to insert two fingers between the chain and the horse’s chin groove.
- Never let your horse eat when wearing a bridle. It may step on the reins or get its feet tangled in them. Also, hay or grass may get caught in the bit and injure the horse’s mouth.
Mounting and Dismounting
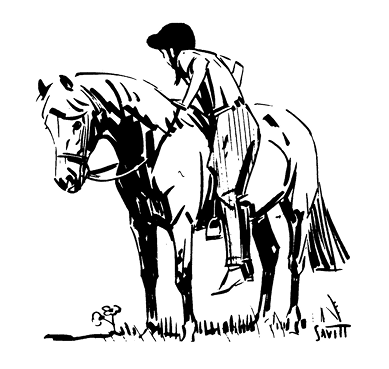
Never mount or dismount a horse in a barn or near fences, trees, or overhanging projections. Sidestepping and rearing mounts have injured riders who failed to take these precautions.
A horse should stand quietly for mounting and dismounting. To be sure the horse stands, you must have light control of its head through the reins.
English riders should “run up” the stirrups on English saddles immediately upon dismounting. The dangling stirrup may startle or annoy the horse. It is possible for the horse to catch the bit or even a hind foot in a dangling stirrup iron when it is going for a fly. Also, a dangling stirrup can be caught on doorways and other projections while the horse is being led.
After running up the stirrups, English riders should immediately bring the reins over the horse’s head. In this position, the reins can be used for leading.
Western riders should also bring the reins forward for leading immediately after dismounting.
Headgear
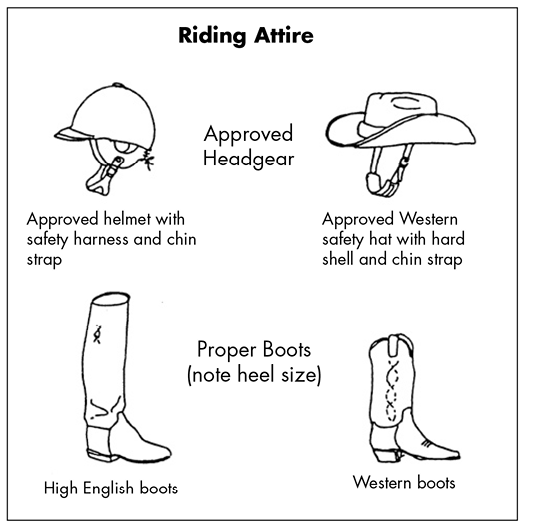
For all Mississippi State University Extension equine events (horse shows/riding clinics/camps/workshops/contests/etc.), anyone 18 years of age or younger who is mounted on or riding a horse anywhere on the grounds must wear properly fastened protective headgear at all times. The following rule is in the 2020 Mississippi 4-H Horse Show Classes, Rules, and Regulations (MSU Extension Publication 821; rule 34 on page 13):
All youth age 18 or under as of January 1 of the current show year are required to wear properly fastened American Standard for Testing Materials (ASTM)/Safety Equipment Institutes (SEI)-approved protective headgear when mounted on a horse. Helmet use is required when mounted AT ALL TIMES on the show grounds, including all performance classes and divisions. Additionally, this policy is in effect in the show pen as well as ALL warm-up/practice pens and on the show grounds when mounted. Helmets must be properly fitted with a chin harness at all times while riding. Violation of this policy may result in disqualification from the show and/or removal from show grounds. It is the responsibility of the youth, or the parent or guardian or trainer of the youth, to ensure that the headgear worn complies with appropriate safety standards for protective headgear intended for equestrians’ use and is properly fitted and in good condition. The State Show Committee and officials are not responsible for checking appropriateness of headgear worn.
Medical studies show that the most common riding-related injuries are to the head. Many of these could be prevented or made less severe by wearing protective headgear.
Protective headgear is a hat that stays on during a fall (not one that hits the ground before the rider). Protective hats cannot be pierced by sharp objects and have extra padding inside to protect riders from a concussion.
There are protective riding hats available for both Western and English riders. Wear protective headgear that carries the appropriate approval. These hats have been shown to be effective in preventing head injuries.
Riding
When riding, wear boots with proper heels to prevent your feet from slipping through the stirrups. Always wear protective headgear, properly fitted and fastened.
Keep your horse under control and maintain a secure seat at all times. Horses are easily frightened by unusual objects and noises.
Until you know your horse, confine your riding to an arena or other enclosed area. Ride in open spaces or unconfined areas when you are familiar with your horse.
When your horse becomes frightened, remain calm, speak to it quietly, steady it, and give it time to overcome its fear.
Hold your mount to a walk when going up or down a steep hill.
Try to avoid paved or other hard-surfaced roads. Walk the horse when crossing paved roads.
If you must ride along the road, ride on the shoulder and follow the rules of the road. Get a driver’s manual from your Department of Motor Vehicles. These rules vary from state to state.
Allow a horse to pick its way at a walk when riding on tough ground or in sand, mud, ice, or snow where there is danger of your horse slipping or falling.
Don’t fool around. Horseplay is dangerous to you and to your friends, as well as to others who may be nearby.
Never ride your horse with just a halter. Halters don’t give you enough control. Use a bridle.
Never rush past riders who are proceeding at a slower gait, as it startles both horses and riders and frequently causes accidents. Instead, approach slowly, indicate a desire to pass, and proceed cautiously on the left side.
Ride abreast or stay a full horse’s length from the horse in front to avoid the possibility of being kicked. You can tell if the distance is safe by looking through your horse’s ears. You should be able to see the hind heels of the horse in front of you.
A red ribbon tied into the tail indicates a kicker, so stay back.
Don’t let a horse run to and from the stable. Walk the last distance home.
If you use spurs, be sure your legs are steady enough so you don’t touch the horse with the spurs by mistake. If you’re not sure, don’t wear them.
When your horse is frightened and tries to run, turn it in a circle and tighten the circle until it stops.
Dogs and horses are not always good companions. Keep your dog under control at all times.
Riding at Night
Riding at night can be a pleasure but is more hazardous than daytime riding. You should walk your horse because fast gaits are dangerous.
Select riding locations with care. Choose controlled bridle paths or familiar, safe, open areas.
If it is necessary to ride at night on roads or highways, wear light-colored clothing and carry a flashlight and reflectors. Check our state regulations for details.
Trailering
Trailering should be done with two people if at all possible. If you have trouble loading or unloading, get experienced help.
Be sure the ground area behind and around the truck or trailer has safe footing before loading or unloading.
Be sure the trailer is level and steady and doesn’t move as the horse tries to enter. Place chocks behind wheels to keep the trailer steady.
Remove the bridle, saddle, and other equipment before loading. Use your halter and a good sturdy lead shank (at least 5 feet) made of cotton rope. Don’t use nylon shanks. They can be dangerous if your horse pulls back.
Always wrap your horse’s legs. Be sure bandages extend over the coronary bands onto the hoof and that they cover the heel area.
Secure the butt chain or bar as soon as the horse is in the trailer and always before tying the horse. Use care when reaching for the chain.
Opinions vary on hauling a horse tied or loose. If you tie, allow sufficient length of rope so the horse can move its head for balance and comfort, but make sure it’s tight enough so it cannot get in trouble or get to the horse next to it.
Always tie with a quick-release knot or use panic snaps on the ties.
When hauling only one horse in a two-horse trailer, load the horse on the driver’s side. Try to distribute the weight of the load evenly.
When hauling two horses in a two-horse trailer, load the heavier horse on the driver’s side.
Use rubber mats for secure footing. By using 3 inches of bedding (shavings, straw, or sand), you can cushion bumps and reduce concussion on your horse’s legs.
Always speak to a horse that is in a truck or trailer before attempting to handle it.
Check your trailer regularly for the following:
- Rotting or weakened floorboards.
- Rusted and weakened door hinges.
- Cracked hitch welds.
When serviced, have the mechanic check the spring shackles and wheel bearings.
The trailer should be of sufficient height to give the horse ample neck and head room. Remove or cover any protruding objects.
When driving, always observe the following:
- Double-check all the connections (lights, brakes, hitch, and safety chains).
- Be sure all doors are secured.
- Drive carefully. Make turns slowly. Start and stop slowly and steadily.
- Look far ahead to avoid emergencies. Drive defensively.
Never throw lighted cigarettes or matches from a car or truck window. They could either start a fire in the area, or the wind could suck them into the trailer.
Check the horse and trailer hitch at every stop before continuing on.
Horses are like people—some get sick from motion. Adjust the feeding schedule to avoid traveling immediately after feeding. Feed smaller amounts more often, if necessary.
Watch your feet and fingers when dropping the tailgate.
Never undo the butt chain or bar before you untie your horse at its head. The horse may try backing out as soon as the tailgate is down.
Use caution by backing the horse out of the trailer straight and slightly toward the center ramps so that it doesn’t catch a leg in the door springs.
If there are two horses in the trailer, have someone stand by the head of the second horse while the first one is backed off the trailer so that it doesn’t think it is free to back off.
Walk the horse to restore circulation before putting it in a stall, especially after a long haul.
When the trailer is disconnected and parked, be sure to place chocks behind the wheels. Never load a horse in an unhitched trailer.
Trail Riding
Ride a well-mannered horse. Excessive speed on the trail is unsafe. Ride at safe gaits.
Avoid overhanging limbs. Watch the rider ahead so a limb pushed aside doesn’t snap back and slap you or your horse in the face.
Starting with the leader of a group, every second rider should warn those behind of dangers such as broken glass, low branches, poor footing, holes, etc.
If a rider falls off and the horse runs away, do not chase it. Halt and wait because the horse may return to the group. If it doesn’t return, send one rider quietly to catch it.
Fire Safety—Plan Ahead
Put the phone number for the fire department by each phone.
Be sure you have adequate and appropriate fire fighting equipment for your barn. Ask your fire department for recommendations. Know how to use the equipment.
Know where large quantities of water can be obtained. Have adequate water outlets with horses in the barn.
Install smoke detectors or heat detectors and connect them to a high-decibel resonant horn so that you can hear it. Clean the detector frequently because heavy dust and bugs can deactivate the alarm.
Know the location of electrical master switches.
Keep a halter and lead rope by each stall. Never lock stall doors.
Have fire drills several times a year to practice getting the horses out of the barn and so everyone knows what to do.
Have a supply of empty feed sacks available for blindfolds. Wet the sacks in the water bucket in each stall before using.
Know where you will secure the horses if you have to evacuate the barn.
Fire Prevention Measures
Do not smoke in the barn.
Clean up all debris and properly dispose of it. Never leave loose hay or straw in aisles.
Store feed, hay, straw, or shavings in a separate building away from the barn. If this is not possible, be sure your loft is well ventilated and that the hay is properly cured—don’t store “heavy” bales.
Check hay for warm spots. If hay temperature is noticeably warmer than when it was put in, watch it closely. If the temperature reaches 150 degrees, take the hay out and divide it into small, shallow stacks.
Oily rags should be disposed of immediately after use. Don’t store flammable materials (paint, gasoline, etc.) in the barn.
Check all electrical wiring for frayed ends and doubled-up extension cords. Fix these immediately.
Never use lightweight extension cords. Buy the heavy-duty cords.
If a fuse blows, check for shorts and other faults. Always use the correct size fuse.
All electrical wiring should be encased in metal conduit and electrical boxes.
Keep aisles clear of equipment.
Inspect all motors, heaters, and electrical devices frequently.
Ideally, all barns should be constructed of non-combustible materials. If you are building a new barn, there are a number of lumber mills that pressure-treat wood so it will burn more slowly.
Establish ongoing and effective rodent control programs—rats chew wires.
Procedures to be followed in the event of fire:
- Call the fire department—the phone number should be posted next to every phone. In a calm, clear voice, give your name, farm name, and location. Do not hang up until you are sure the information has been understood.
- Open one door of the stable only. As long as possible, keep the flow of fresh air and oxygen to a minimum so the fire will not explode. If the fire is spreading rapidly and there is heavy smoke, stay out of the barn.
- Evacuate horses:
- Halters and lead ropes should be on each door. Lead each horse out of the barn to a predetermined area. If you turn a horse loose, it will probably run right back to its stall.
- If the horse won’t lead, blindfold it using a towel, handkerchief, or gunny sack. Wet the sack in the water bucket in each stall before putting it on the horse’s head.
- Put the horses in a paddock a safe distance from the barn and out of the way of the fire-fighting equipment. Make sure horses are contained so that in their panic they don’t return to their blazing stalls.
- Open all access gates to the barn area for fire equipment. Save equipment only after all horses are out.
- Use available fire-fighting equipment (fire extinguishers, hoses, wet gunny sacks, or shovels and dirt) to contain the fire until help arrives.
- Keep roads clear for fire equipment.
- Once help arrives, immediately check your horses for injuries. Call a veterinarian if horses are burned or have inhaled a lot of smoke. Check the eyes, and if you notice any burned areas, cover the eyes with a clean, moist cloth.
- Check for burns around the nostrils and apply petroleum jelly or mineral ointment if you find any. Keep any burned areas on the body or legs moist with a cold, wet cloth. Do not medicate the burns unless necessary.
Publication 852 (POD-04-23)
Distributed in Mississippi by Dean Jousan, PhD, Associate Extension Professor, Animal and Dairy Sciences.
The Mississippi State University Extension Service is working to ensure all web content is accessible to all users. If you need assistance accessing any of our content, please email the webteam or call 662-325-2262.


